The recipe I am sharing with you this week is for a quick and easy family favourite, “Salad Bar Subs!”.
These tasty submarine style sandwiches are not only simple to make, but go together in a flash (once all of the ingredients have been assembled) and are a lot more nutritious than the usual submarine sandwich fare!
Jump straight to the short recipe!
Gathering All the Ingredients
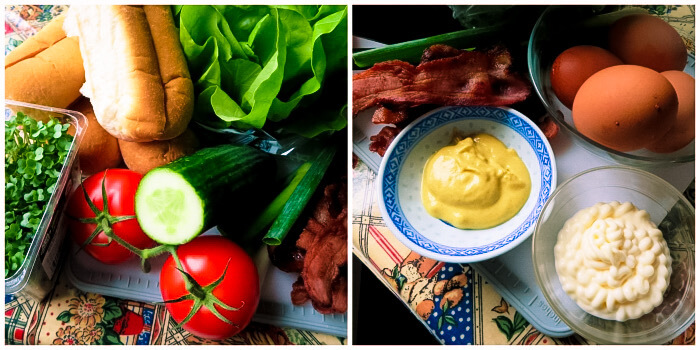
They are a delicious mix of crusty rolls, farm fresh ingredients, a fabulously tasty egg salad, salty bacon and crisp salad sprouts! I have used mustard cress, but alfalfa or any other sprouts also go very well!
Except for the bacon these are high in protein, low in fat, and are an excellent source of iron. Your family are really going to love these, and I can promise you they won’t miss the calorie dense sub shop versions of submarine sandwiches in the least!
If you use a whole grain sub bun, or a seeded one, then they will also be higher in fibre!
Making the Egg Salad

One of the main ingredients for these sandwiches is a deliciously low-fat egg salad. It is composed simply of chopped boiled egg, light mayonnaise, and chopped green onions.
Peeling hard boiled eggs can be somewhat of a nuisance I know, but after many years I have cracked (no pun intended) the way to ensure that your eggs are perfectly hard cooked (with no smelly grey ring) and very easy to peel.
How to Hard-boil Eggs and Peel them Efficiently

1. My first tip is NOT to use really fresh eggs. The fresher the egg, the harder it will be to peel. As eggs age, the air pocket in them expands and this, in turn, makes them much easier to peel. I tend to use eggs that have been purchased and sitting in my fridge for at least a week.
2. The grey ring that you will sometimes see on a hard-boiled egg is sulphur which results from over-cooking them. Timing is important.
3. Boiled eggs that are over-cooked also result in smelly eggs and a rubbery yolk, which nobody likes. Too short a time and you will get yolks that are a bit to soft and gelatinous to use for egg salad.
I have a “colour change” acrylic egg timer that I pop into the pot with my eggs when I am boiling them. I start with room temperature eggs, and water just at the simmering point to which I have added a touch of white vinegar and a pinch of salt to the pot.
If your eggs are cold right out of the refrigerator, you risk them cracking. I lower my eggs with a spoon carefully into the saucepan along with my egg timer and then cook them according to its colour change.
You can also buy stop-watch kinds of timers, old fashioned hour-glass egg timers. Or you can just play it by ear and time according to the following:
Egg Boiling Times:
- 6 minutes: A liquid yolk and soft white. This is perfect for eggs served in an egg cup.
- 6 1/2 minutes: A soft, jammy yolk. This is my favourite for eggs on toast or soft-boiled eggs on a salad.
- 8 minutes: A soft yolk but firm enough to hold its own.
- 10 minutes: The early stages of a hardboiled egg, with just a smidge of softness in the middle.
- 12 minutes: A hardboiled egg with a lighter yolk.
- 14 minutes: Your traditional hardboiled egg with the lightest yolk and a firm white, but not overcooked.
For Egg salad you will want to cook them for 14 minutes.
4. At that point I immediately drain them and pop them into a bowl of cold or iced water, bringing them down to at least room temperature before proceeding.
5. Once they have cooled, I give them a sharp tap on the counter at both ends, cracking the shells, and then I gently roll the egg firmly across the surface of my cutting board which helps to loosen the remainder.
6. You should then be able to peel off the shell very easily without any problem. You can also insert a teaspoon into the cracked shell and use that to loosen and remove the shells.
Mashing the Egg Salad Together
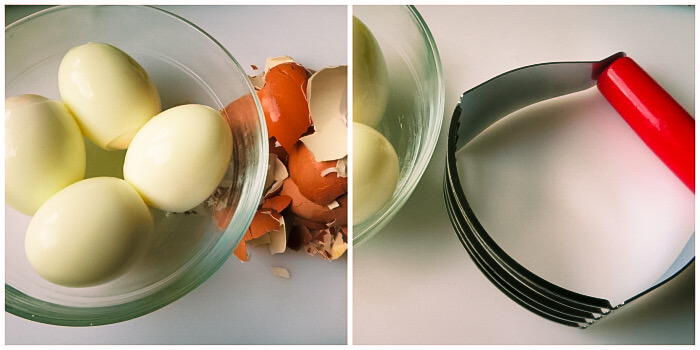
I find the best tool to use in chopping my peeled eggs for egg salad is a traditional pastry blender.
I put my eggs into a bowl and just pass the pastry blender through them for a couple of passes and presto! I have perfectly chopped boiled egg!
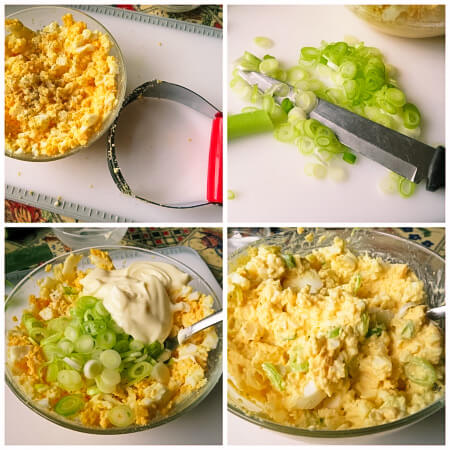
Once you have your eggs chopped it is simply a matter of adding the remaining ingredients, which are some light mayonnaise, thinly sliced spring onions, and a seasoning of salt and pepper. Simple and easy.
Slicing the Cucumbers and Tomatoes

Fresh English Cucumbers are also used in these delectable subs. Make sure you wash your cucumber well, removing any grit that might remain. I like to keep the skins on for colour and texture, but that is a personal choice. You can certainly remove them if you wish, using a vegetable peeler.
I also like to take a fork and run the tines of the fork firmly down the sides of the cucumber from the stem end towards the centre of the cucumber. This makes for an attractive finish, and my mom always told me that it helped to remove any bitterness from the cucumber.
Old Wives’ Tale or not, its been many years since I have run across a truly bitter cucumber! You can then use a sharp knife to cut them into thinnish slices.
The other fresh ingredient is vine ripened tomatoes, thinly sliced. I find a serrated knife (like bread knives or small serrated utility knives) to be the best tool for slicing tomatoes thinly. The teeth grab the tomato perfectly and just do the best job in my opinion!
Top Tip
I always keep my tomatoes in a bowl outside of the refrigerator. Tomatoes are one fruit which will continue to ripen on the countertop and doing so will help to enhance even the most dully flavoured store purchased tomatoes! I never buy more than I know I will use within a week’s time period.
How to Fry Bacon for Ultimate Crispiness
- Frying bacon is really easy if you do it in the oven. I fry my bacon a whole package at a time.
- I line a couple of baking sheets with aluminium foil and lay the bacon out in single layers, leaving a bit of space in between each rasher.
- About 7 to 8 minutes at 425°F and you will have perfectly cooked bacon that hasn’t curled.
Assembling the Sub Sandwiches
Once you have all your ingredients ready making these tasty subs is very quick and simple. Just slice the sub buns open almost all the way through and spread the cut sides with Dijon mustard. Why Dijon? I find it has the nicest sharpest flavour for these!
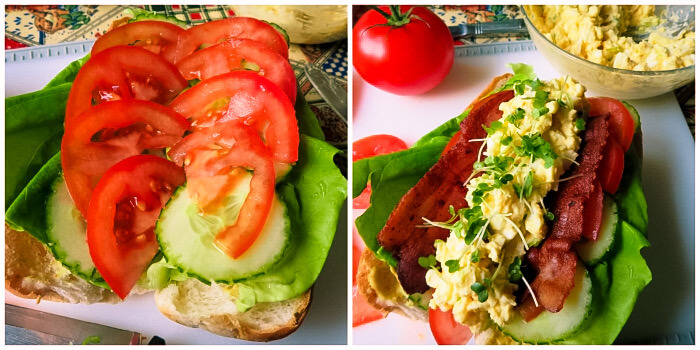
Once I have them spread with the mustard, I add my lettuce leaves, then my sliced cucumbers and tomatoes. If your buns are a bit on the small side, you can cut the tomato slices in half.
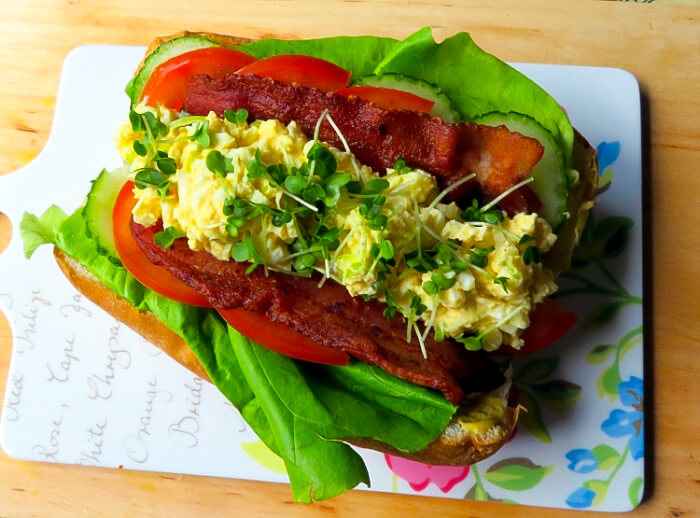
I lay the cooked bacon slices on top of the sliced vegetables, and then I pile the egg salad down the middle, finally topping it with my sprouts! Voila! A delicious lunch or light supper for the family!
If you wanted to serve these for supper you could add some potato salad on the side and some raw vegetable sticks. I can almost guarantee your family is going to love these tasty sandwiches! Don’t forget to pass the napkins!
Family Favorite Salad Bar Sub Sandwiches Short Recipe
Makes: 4
Messy, delicious, easy to make, and nutritious!
Ingredients
- 4 hard-cooked free-range large eggs
- ¼ cup light mayonnaise
- 2 green onions, sliced
- Salt and black pepper to taste
- 4 submarine rolls
- 2 tbsp Dijon mustard
- 8 lettuce leaves
- 2 ripe tomatoes, sliced thinly
- ½ English cucumber, sliced thinly
- ½ cup salad sprouts (alfalfa, mustard cress, etc.)
- 8 slices crisp-cooked bacon
Instructions
- Chop the hard-boiled eggs and mix together in a bowl along with the sliced green onions, and salt and pepper to taste. Set aside.
- Slice each roll almost all the way through. Open the rolls up and spread the cut sides with the mustard.
- Arrange a lettuce leaf on each side of the rolls.
- Top with the sliced tomatoes, cucumbers, sprouts, and cooked bacon, dividing equally amongst each.
- Place an equal amount of the egg salad in each roll.
- Serve immediately.
Complete Steps in Pictures

Step 1 – Gather the ingredients! 
Step 2 – Separate the ingredients for the egg salad 
Step 3 – boil and peel the eggs 
Step 4 – mash the eggs 
Step 5 – chop onions and mix with mayo and eggs 
Step 6 – peel cucumbers and tomatoes 
step 7 – assemble 
all ready – salad bar sub 
Doesn’t t look amazing? 
Closeup of Salad Bar Sub Sandwich
Check out some of my other recipes:

